

“], “filter”: { “nextExceptions”: “img, blockquote, div”, “nextContainsExceptions”: “img, blockquote, a.btn, a.o-button”} }”>
Heading out the door? Read this article on the new Outside+ app available now on iOS devices for members!
>”,”name”:”in-content-cta”,”type”:”link”}}”>Download the app.
If you’re an outdoor adventurer, there are countless reasons to be unabashedly enthusiastic about winter. Spending hours on end in ski or snowboard boots does not make that list.
Yes, ski boots are intentionally stiff and heavy in order to keep your feet and ankles in a safe position. And yes, any time spent on the slopes is worth it. But held hostage in dorsiflexion, with your lower legs angled mercilessly forward, the muscles on your shins and ankles end up being contracted for longer than usual, resulting in that dread tightness and tiredness. (As the folks at Ski Magazine recently pointed out, “That’s why spas at ski resorts are a thing.”)
Being locked in that static position also places a constant load on the already hardworking muscles of your lower legs and ankles, namely the tibialis anterior and extensor digitorium longus muscles that attach to the tops of your feet.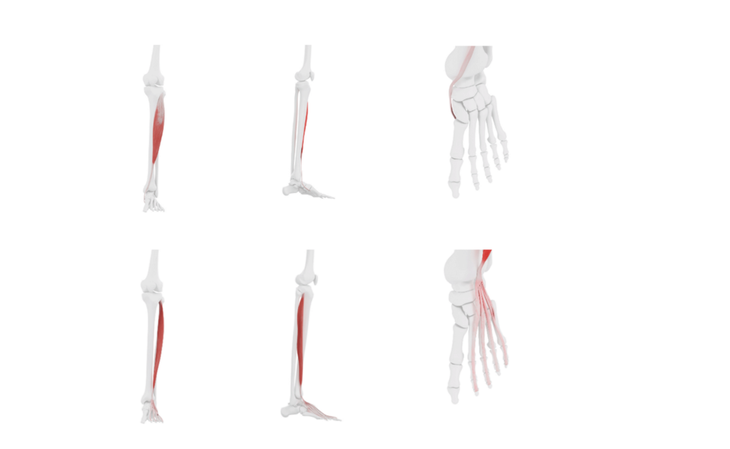
As if that wasn’t enough, muscle movement in the lower legs works like a pump to help move blood and lymph through vessels. Take that movement away, as happens when you’re in ski boots, and fluid can begin to pool, leading to that familiar achy feeling.
But setting aside just five minutes to do some simple ski stretches can help remedy that. Practice these anywhere you tug off your ski boots—at the base of the slopes, in the lodge, even out in the parking lot.
4 Best Après-Ski Stretches for Your Aching Lower Legs
All you need is a chair, bench, or patch of ground to sit and some blankets, towels, sleeping bags, even an unused hat or layer of cushy clothing.
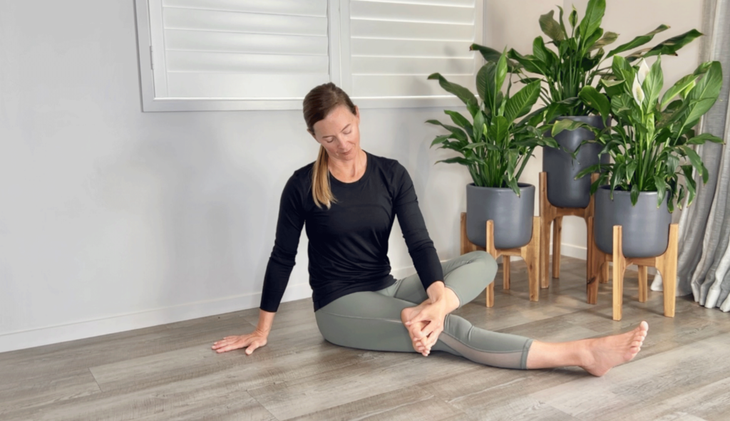
1. Zipper Toe Stretch
Why it helps: Simply stretching your toes eases your feet out of the shape they’ve been locked in and reintroduces movement, which helps restore circulation of the blood and lymph. It also sets the stage for the more intense stretches to come, as the toes are where many of your lower leg muscles attach.
How to: Find a comfortable seat on the ground or on a bench. You could even start your stretching while sitting on the tailgate of your truck. Bring your right ankle to your left knee to create a figure-4 shape. Wriggle the fingers of your left hand in between the toes of your right foot to gently reintroduce space between them. Point and flex your toes a few times. Then point, flex, and circle your whole foot and ankle a few times. Swap sides.
Inspired by: Ever hear a yoga teacher say to spread your toes in Mountain Pose (Tadasana)? That’s essentially what you’re doing here.

2. Tibialis Release
Why it helps: When a muscle has been in a single position for an extended time, especially the contracted state of tension, it might need some encouragement to release their grip. That applies to the tibialis anterior along your shin after you extricate yourself from your boots. This pressure point can fast-track that release and maximize ROI on any stretches you practice afterward.
How to: From sitting, draw your bent right knee toward your chest. Bring your left hand to your right shin and hold your knee close, then use the flat pads of your left fingers to lightly press about two to three inches below your outer knee along the edge of your shin bone. Flex your right ankle to draw the top of your foot closer to your shin and feel the muscle contract. Keeping your ankle flexed, gently increase the pressure from your fingers. Maintain that pressure as you slowly point your right foot. You’ll feel your muscles shift beneath your touch. Release the pressure, flex your right ankle again, and repeat. If you sense that more pressure would be helpful, use your right palm on top of your left fingers. Stay here for a few deep breaths, then switch and try it on your left side.
Inspired by: There is no yoga equivalent for trigger point release, although slowing your breath has been found by ancient yoga teachers as well as contemporary science to facilitate the release of muscular tension.
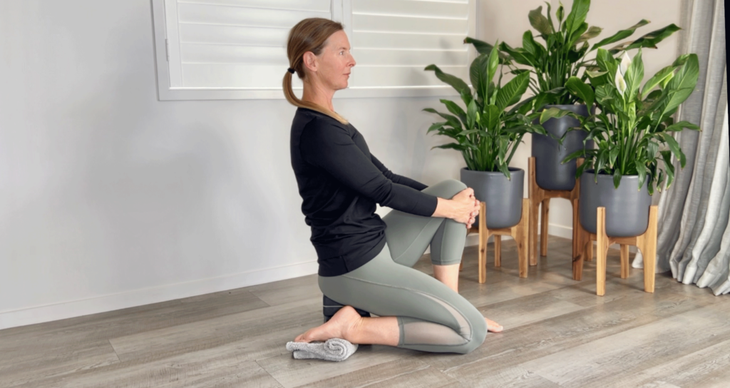
3. Half Saddle
Why it helps: It’s no surprise that taking your feet and ankles in the opposite direction of their longheld flexion can bring relief. Lingering in this stretch can, with persistence and patience, help rid the muscles along the tops of your feet and the fronts of your ankles from any lingering tension.
How to: Make your way into a Low Lunge with your left foot forward and your right knee on the ground behind you. Stack a couple folded blankets and place them inside your right foot. Slide your left foot closer to your right knee and shift your hips back until you’re sitting on the stacked blankets.
Fold a towel, scarf or jacket into a narrow rectangle and then roll part of it to a diameter of about 2 inches, leaving the remainder flat. Position the roll under the curve at the front of your right ankle so the flat tail cushions the top of your foot. If you want additional cushioning, make the roll a little larger.
Sit upright and feel the stretch along the front of your right leg, including the front of your ankle and foot and the tops of your toes.
If you don’t feel enough sensation, tuck your tailbone, walk your hands behind you, and start to lean your torso backward, whether a little or a lot. Stay here for up to a couple of minutes, allowing the muscles that have been shortened all day in your ski boots to slowly release. Then ease out of the stretch and repeat on your other side.
Inspired by: This variation on Hero Pose (Virasana) can be practiced seated or reclined, with one or both legs bent at a time.
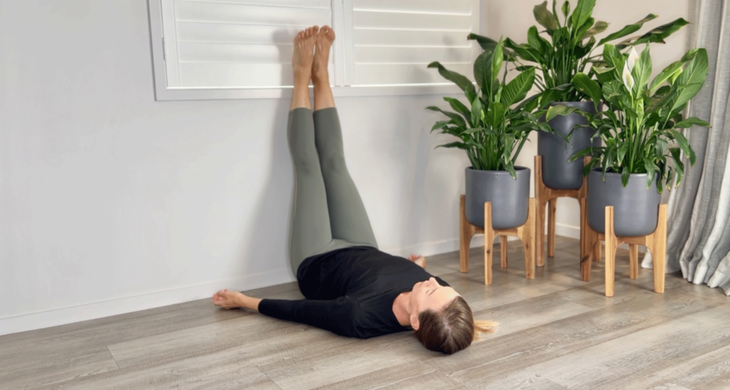
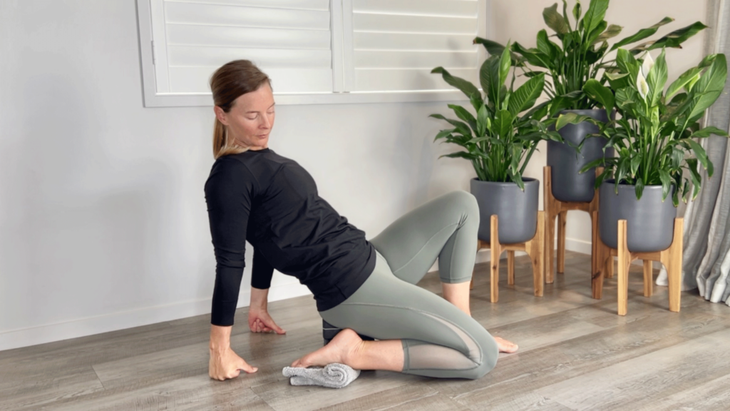
4. Legs Up the Wall (or Tree or Truck)
Why it helps: After hours of defying gravity, let yourself succumb to it. Gravity is one of the primary influences on blood and lymphatic flow in the lower body, along with movement in the calf muscles. Elevating your legs supercharges the movement of these vital fluids back where they belong, bringing a lingering feeling of ease in your feet.
How to: Sit on the ground with one hip alongside a wall, a tree, even the side of your truck. Start to lower your back to the ground as you sweep your legs up against the support. (If you’re outside, you probably want to spread some blankets, jackets, or a sleeping bag on the ground for some cushioning and warmth.)
Bring your feet together or take them hip-distance apart. Lean your legs against the wall, tree, or vehicle. If the stretch along the backs of your legs feels intense, scoot your hips a little further away from the wall so you can release your muscles rather than white-knuckle your way through the stretch. Point and flex your feet a few times before you settle into stillness. Let your head, shoulders and hips feel heavy. Slow your breath and stay here as long as you like.
Inspired by: Legs Up the Wall Pose


